

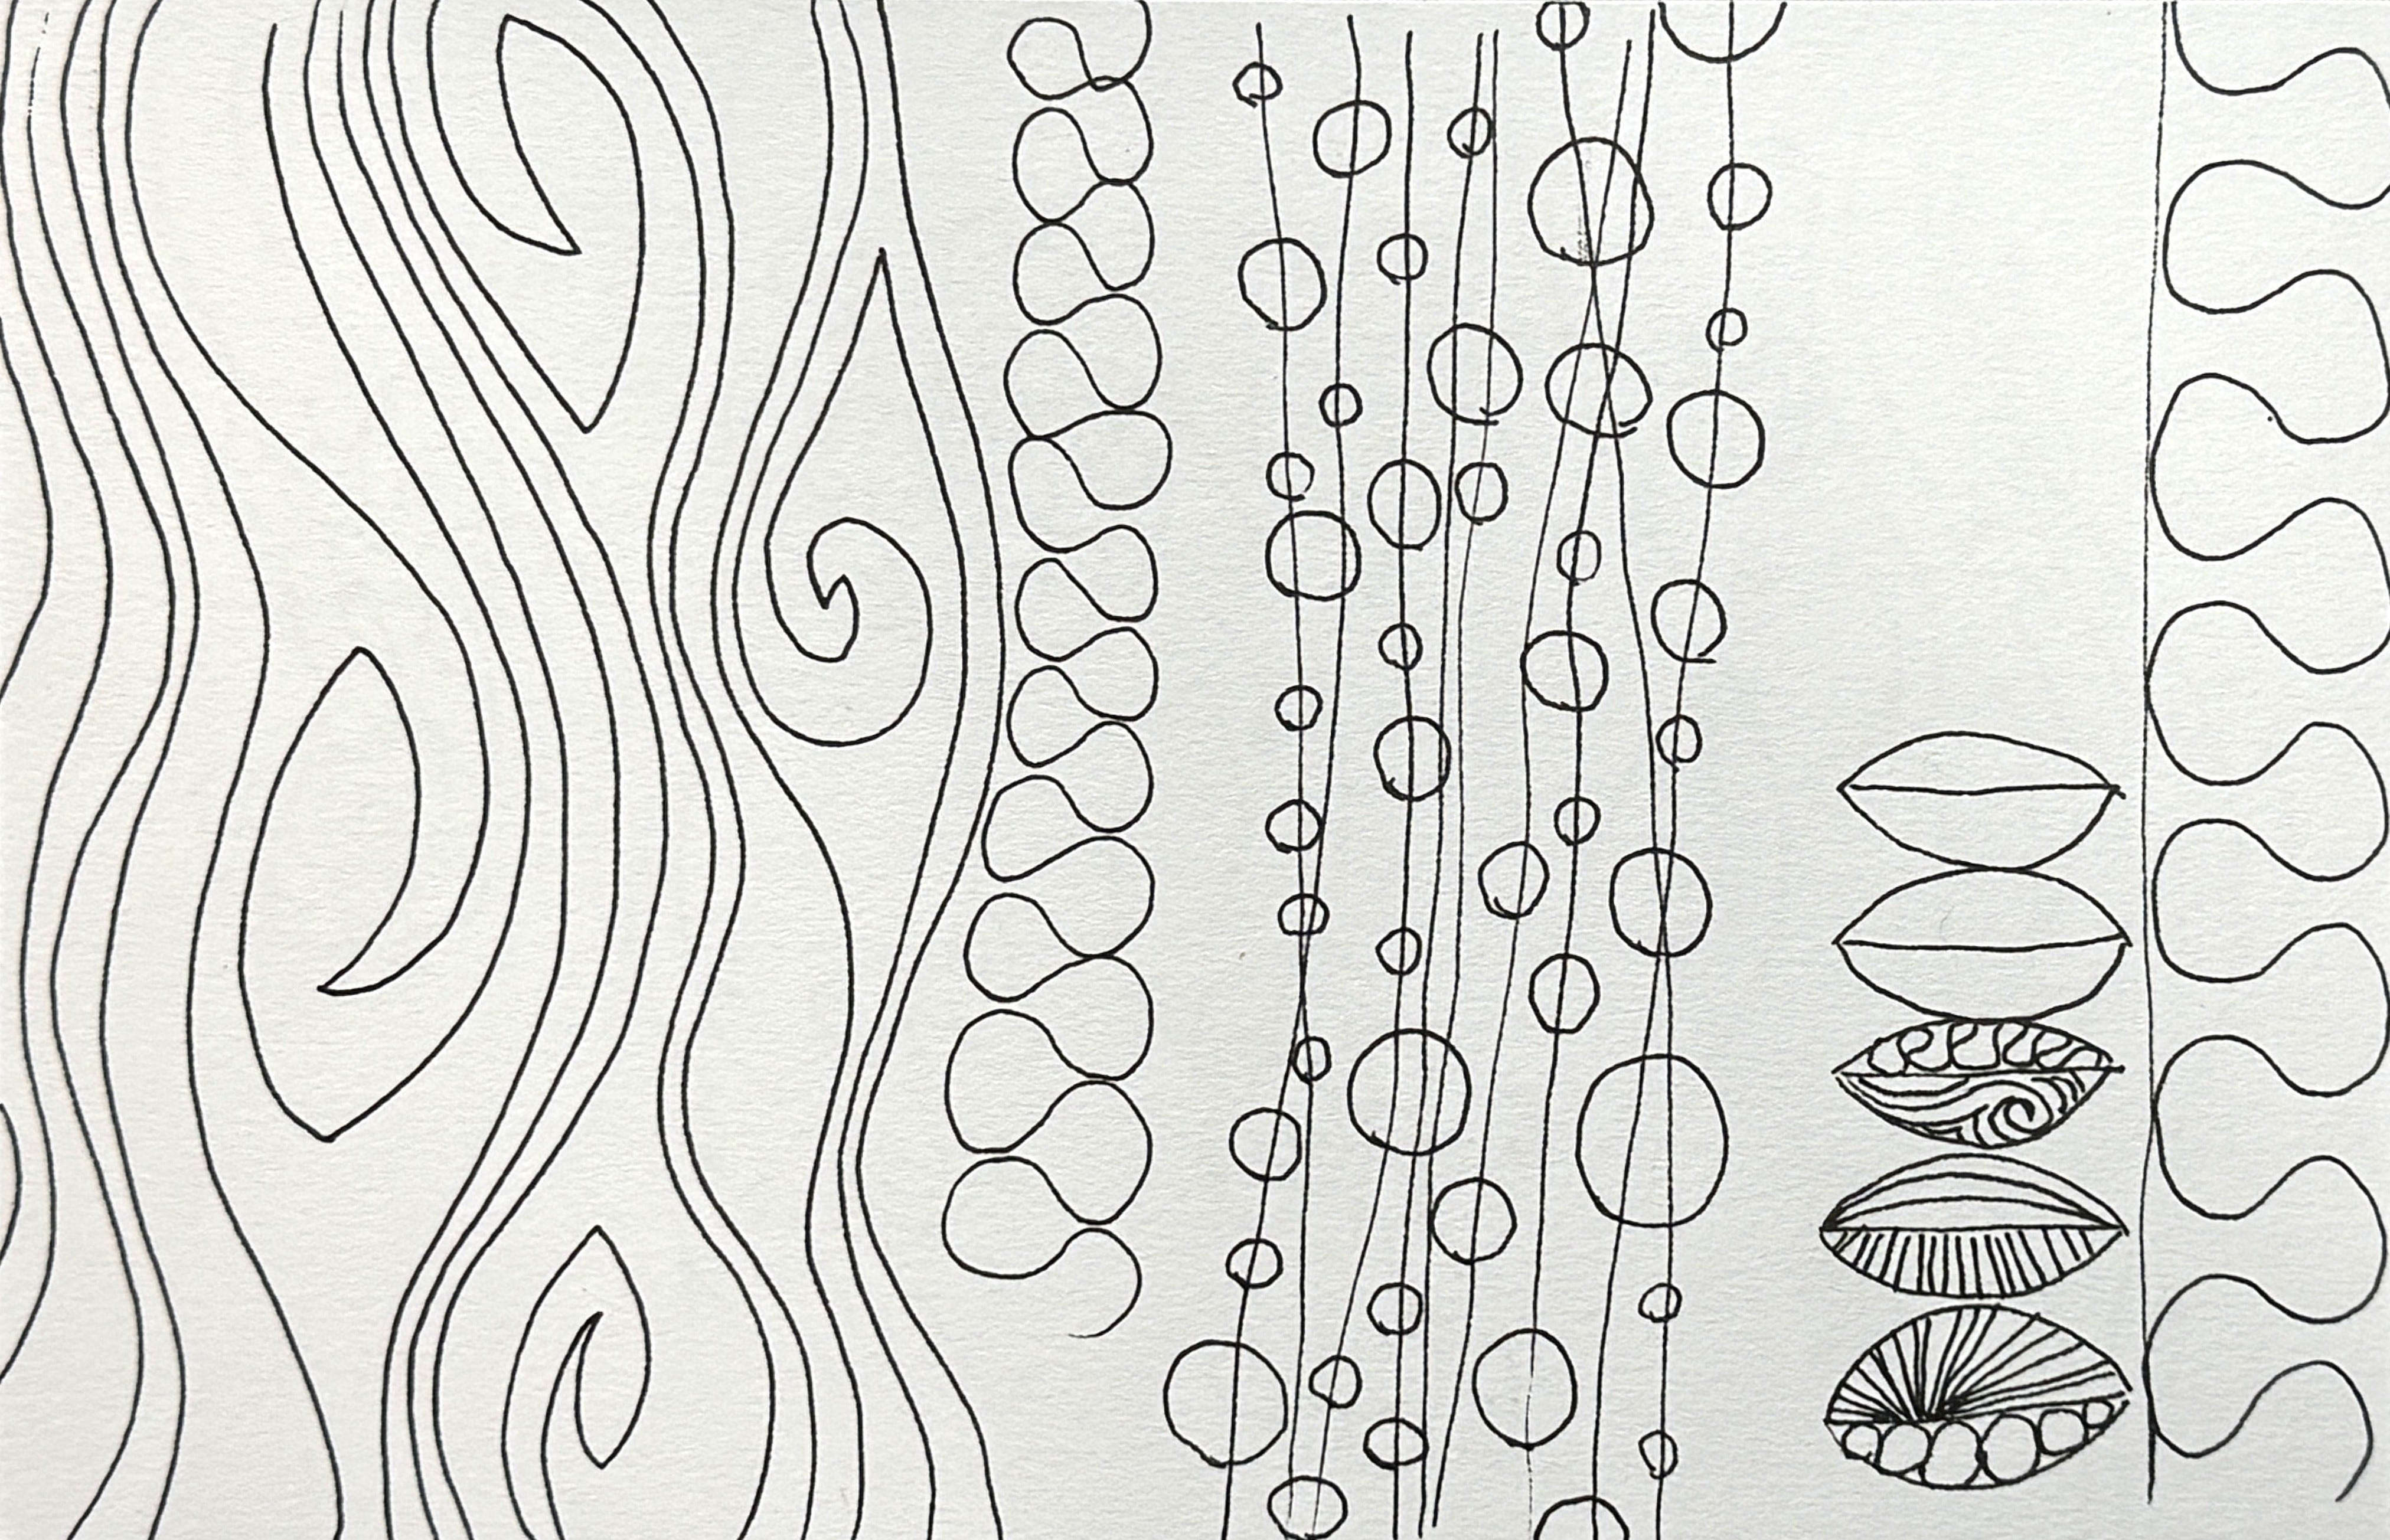
Before I got sick, I filled sketchbooks with many free motion quilting patterns. Wood grain, ribbon candy, effervescence, seafoam, swirl hooks. My hand learned designs from Christina Cameli and Angela Walters, and sometimes I created my own.
By drawing them repeatedly, I didn’t have to think about them to quilt them— my hand followed a rhythm. That’s the thing about body memory: the hand knows what the brain has stopped tracking.
Today we’re slowing down and drawing some of those patterns. I call it Free Motion Drawing.
Energy Rating: 2, and this practice is portable.
Free Motion Drawing
Free Motion Drawing is what I call the practice drawings I do before I quilt the pattern onto a quilt. I have filled many sketchbooks with these drawings and usually repurpose them into collage fodder and backgrounds in my mixed media work. Recently, I’ve been appreciating the line quality in them and purposefully drawing them onto mixed media pieces.
Free motion quilting is line drawing with thread across the quilt top. For this machine quilting technique, the needle remains stationary and you move the quilt underneath the needle in all directions to create the motifs and patterns (a.k.a. the drawing). This allows you to draw curves, loops, flowers, swirls and all sorts of line designs with thread in one continuous line drawing.
Free motion drawing helps me build body memory for these patterns. Body memory is a form of implicit memory meaning the memories are unconsciously encoded, stored, and used without awareness. For example, learned motor skills like writing or the flight, fight, or freeze response. Body memory is automatic; it flows from procedural, sensory and emotional information all at once. And it builds self-awareness, emotional regulation, and resiliency to adapt to new experiences.
We won’t be stitching these, but we will be drawing some of my favorite patterns. Here are the ones we’ll draw today:
Wood grain
Effervescence
Leaves
Ribbon candy
Flower
Because the dot and the line are the most basic visual elements, they are deeply connected to creating your own visual language through texture, shape, rhythm, pattern, and other principles of design.
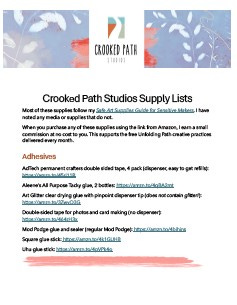
Supplies
For the Check in:
paper: copy paper or a sketchbook
pencil
3 objects you can drop onto your paper ( I used some seashells)
1 object you can easily push around your paper (I used a roll of washi tape)
A scrap piece of paper that you can tear
Something you can trace around the edges that will fit on your paper (I used a rectangle about 1.5x2”)
Black marker or brush pen if you have it
For the Practice:
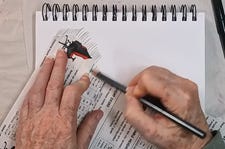
A fine tipped pen or marker (for example .02, .03)
Paper: copy paper, cardstock, watercolor paper or a sketchbook
If you need supplies, please consider purchasing from one of my affiliate links. I may earn a small commission (at no cost to you) from qualifying purchases.
Blick Art Supplies
Mark Making: visit the Mark Making list and look for black pens like Sakura or Blick Studio Pigment Liners
Amazon
The Practice
Check-in
Heads up, this check-in could be a practice unto itself. Take your time, explore and be curious, full demonstrations are in the video.
Exploration 1: Pressure
Use your pencil to make dashes and dots on your paper using different levels of pressure. What kind of emotions or energy are these dashes and dots saying to you?
Exploration 2: Movement
Place an object on your paper and push it around with your pencil without letting it fall off. Notice the lines this makes. Notice when it starts to feel like a game.
Exploration 3: Pattern
Pick any shape and repeat it until it fills the page. It could be a letter, a geometric shape, an organic shape. Notice what happens to your attention.
Exploration 4: Shape
Drop three objects onto your paper, trace where they land, then remove them. Does the shape remind you of anything? What happens if you fill the shape in?
Exploration 5: Edges & Contrast
Tear a scrap of paper and place the ragged edge on your page. Make short scratch marks starting on the scrap paper and flowing onto your sketchbook page. Then lift the paper. Reposition and repeat. Notice what the drawing becomes.
Exploration 6: Pressure & Position
Use your brush pen or marker to make lines with different widths by changing the pressure, your grip, and angle. What happens when you hold it at the very end?
Exploration 7: Positive and Negative Space
Trace an object on your page and remove it. The shape inside the line is positive space — leave it blank. Fill the space outside with squiggles or hash marks. Notice what happens to the shape inside.
Create
All five motifs are built from the same basic lines and shapes — once you know these, the patterns follow. Here are the basic lines and shapes:
Circle
Curved line
Loop
Arch or Tear drop
Swirl or spiral
Wood Grain
This is a series of curved lines and half tear drop or arc shapes to create a wood grain pattern.
Make a gently curved line and stop about halfway down your paper.
Now make a half tear drop or arc shape that curves back up that first line but don’t close the tear drop.
Make a smaller half tear drop shape that curves back down but don’t close the tear drop—this should look like a squished hook or flattened concentric circle.
Now follow the first line you made out to the top of your tear drop. You now have a wood knot.
Echo the curved line back down the page. Continue echoing on both sides of your wood knot and adding more wood knots as you like.

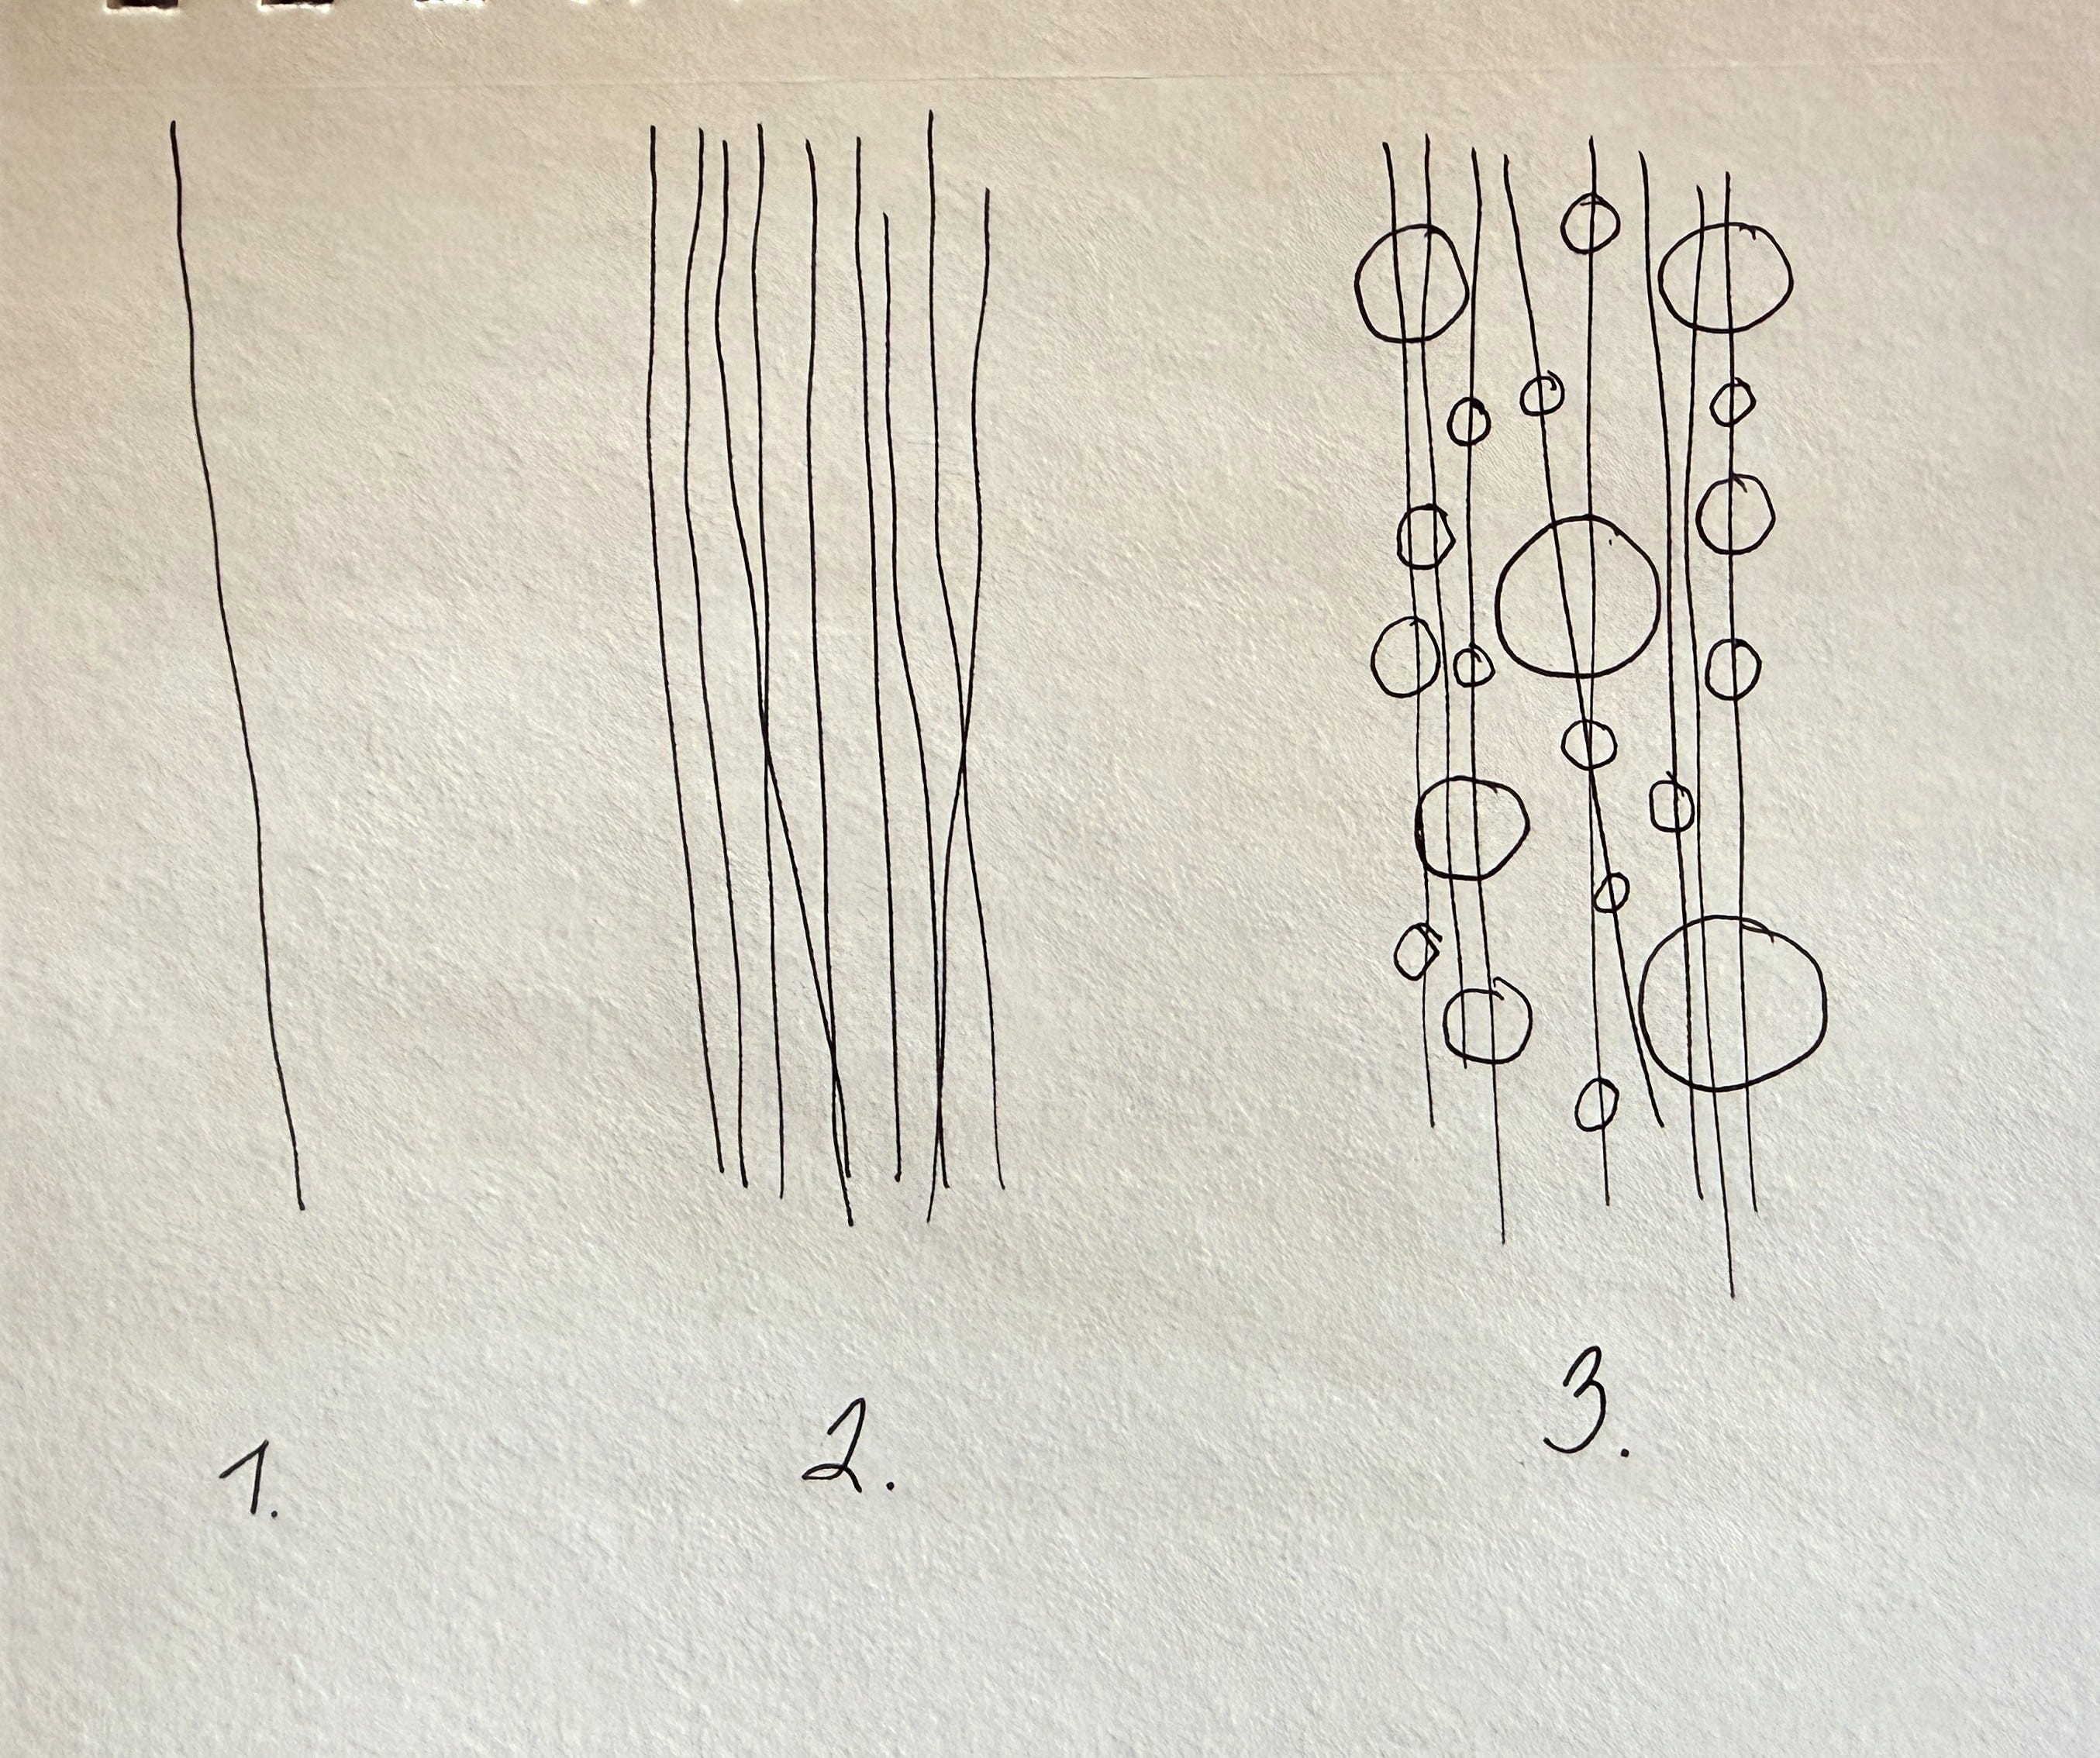
Effervescence
This is a series of lines and circles that look like champagne bubbles.
Draw a sort of straight line.
And then draw some more.
Now draw different sized circles over the lines.
Seriously, that’s it. It’ll surprise you.
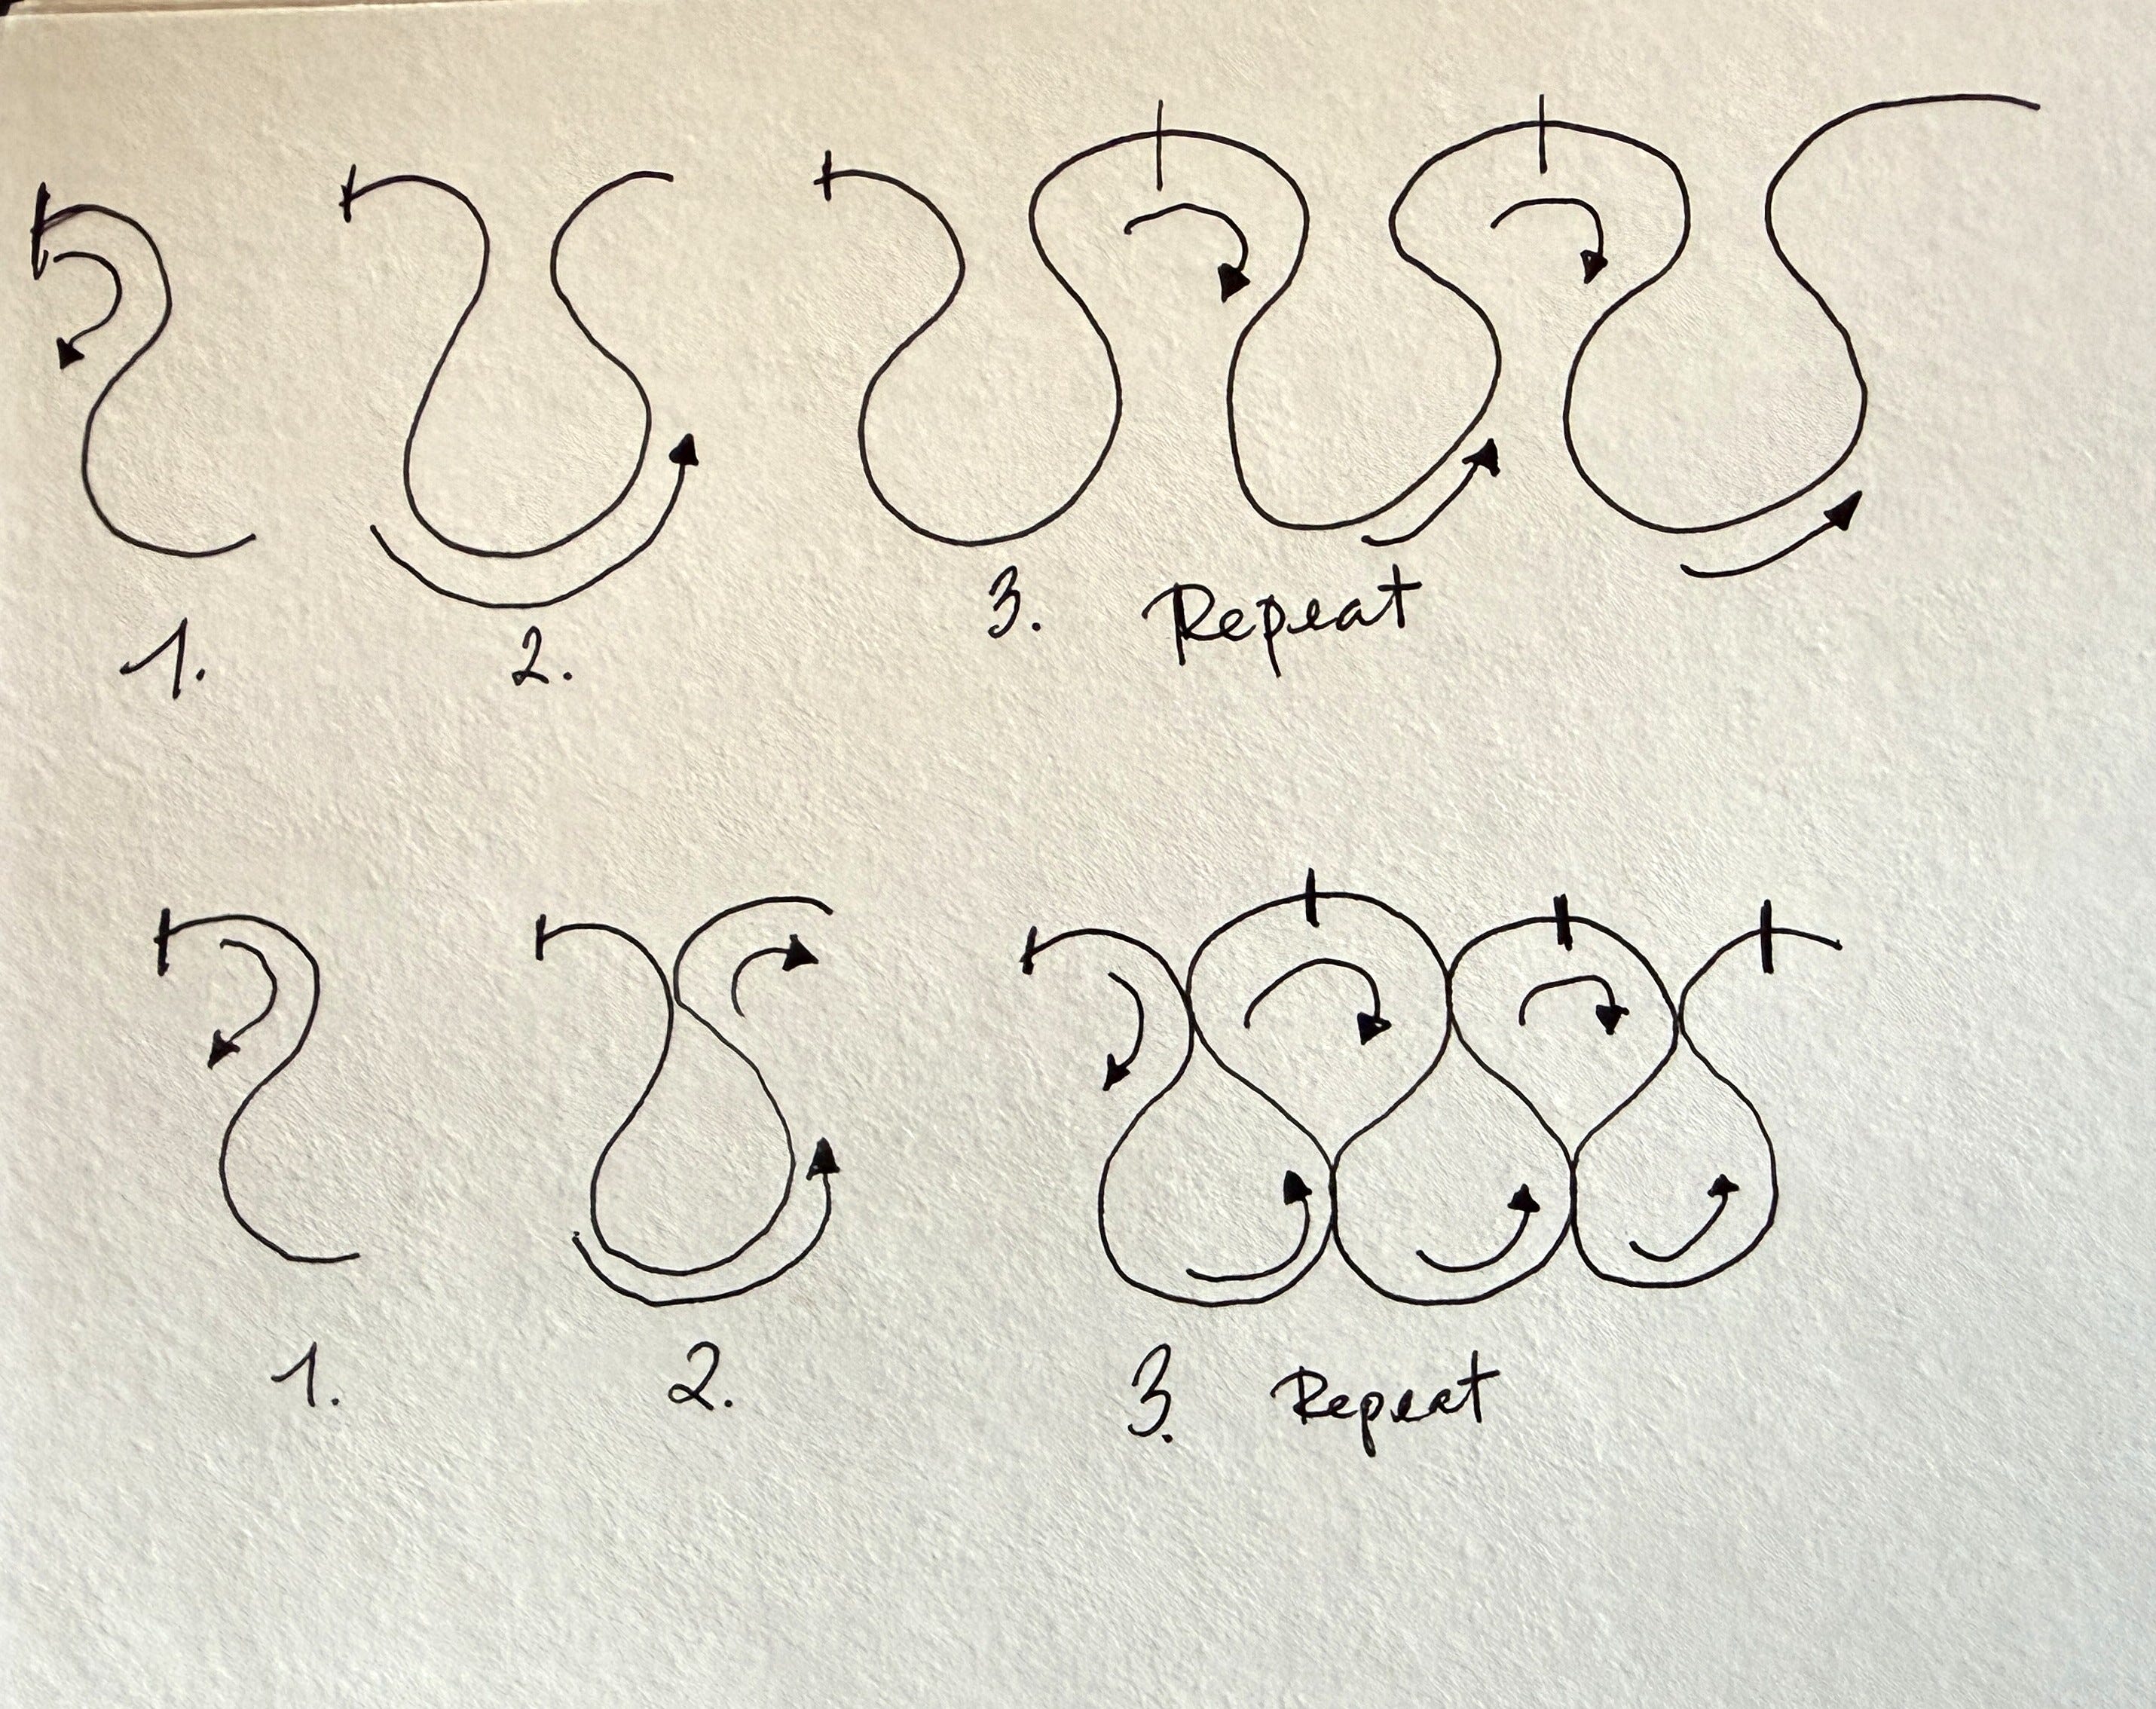
Ribbon Candy
This can be open or closed and looks like wavey candy cane candy.
Draw a backward S.
Then mirror that same shape on the other side so you end up with a bulbous U.
Then repeat those motions until you find a rhythm and a string of ribbon candy.
To close the ribbon candy, make your lines touch at the top and bottom of each bulb (see photo below and video).
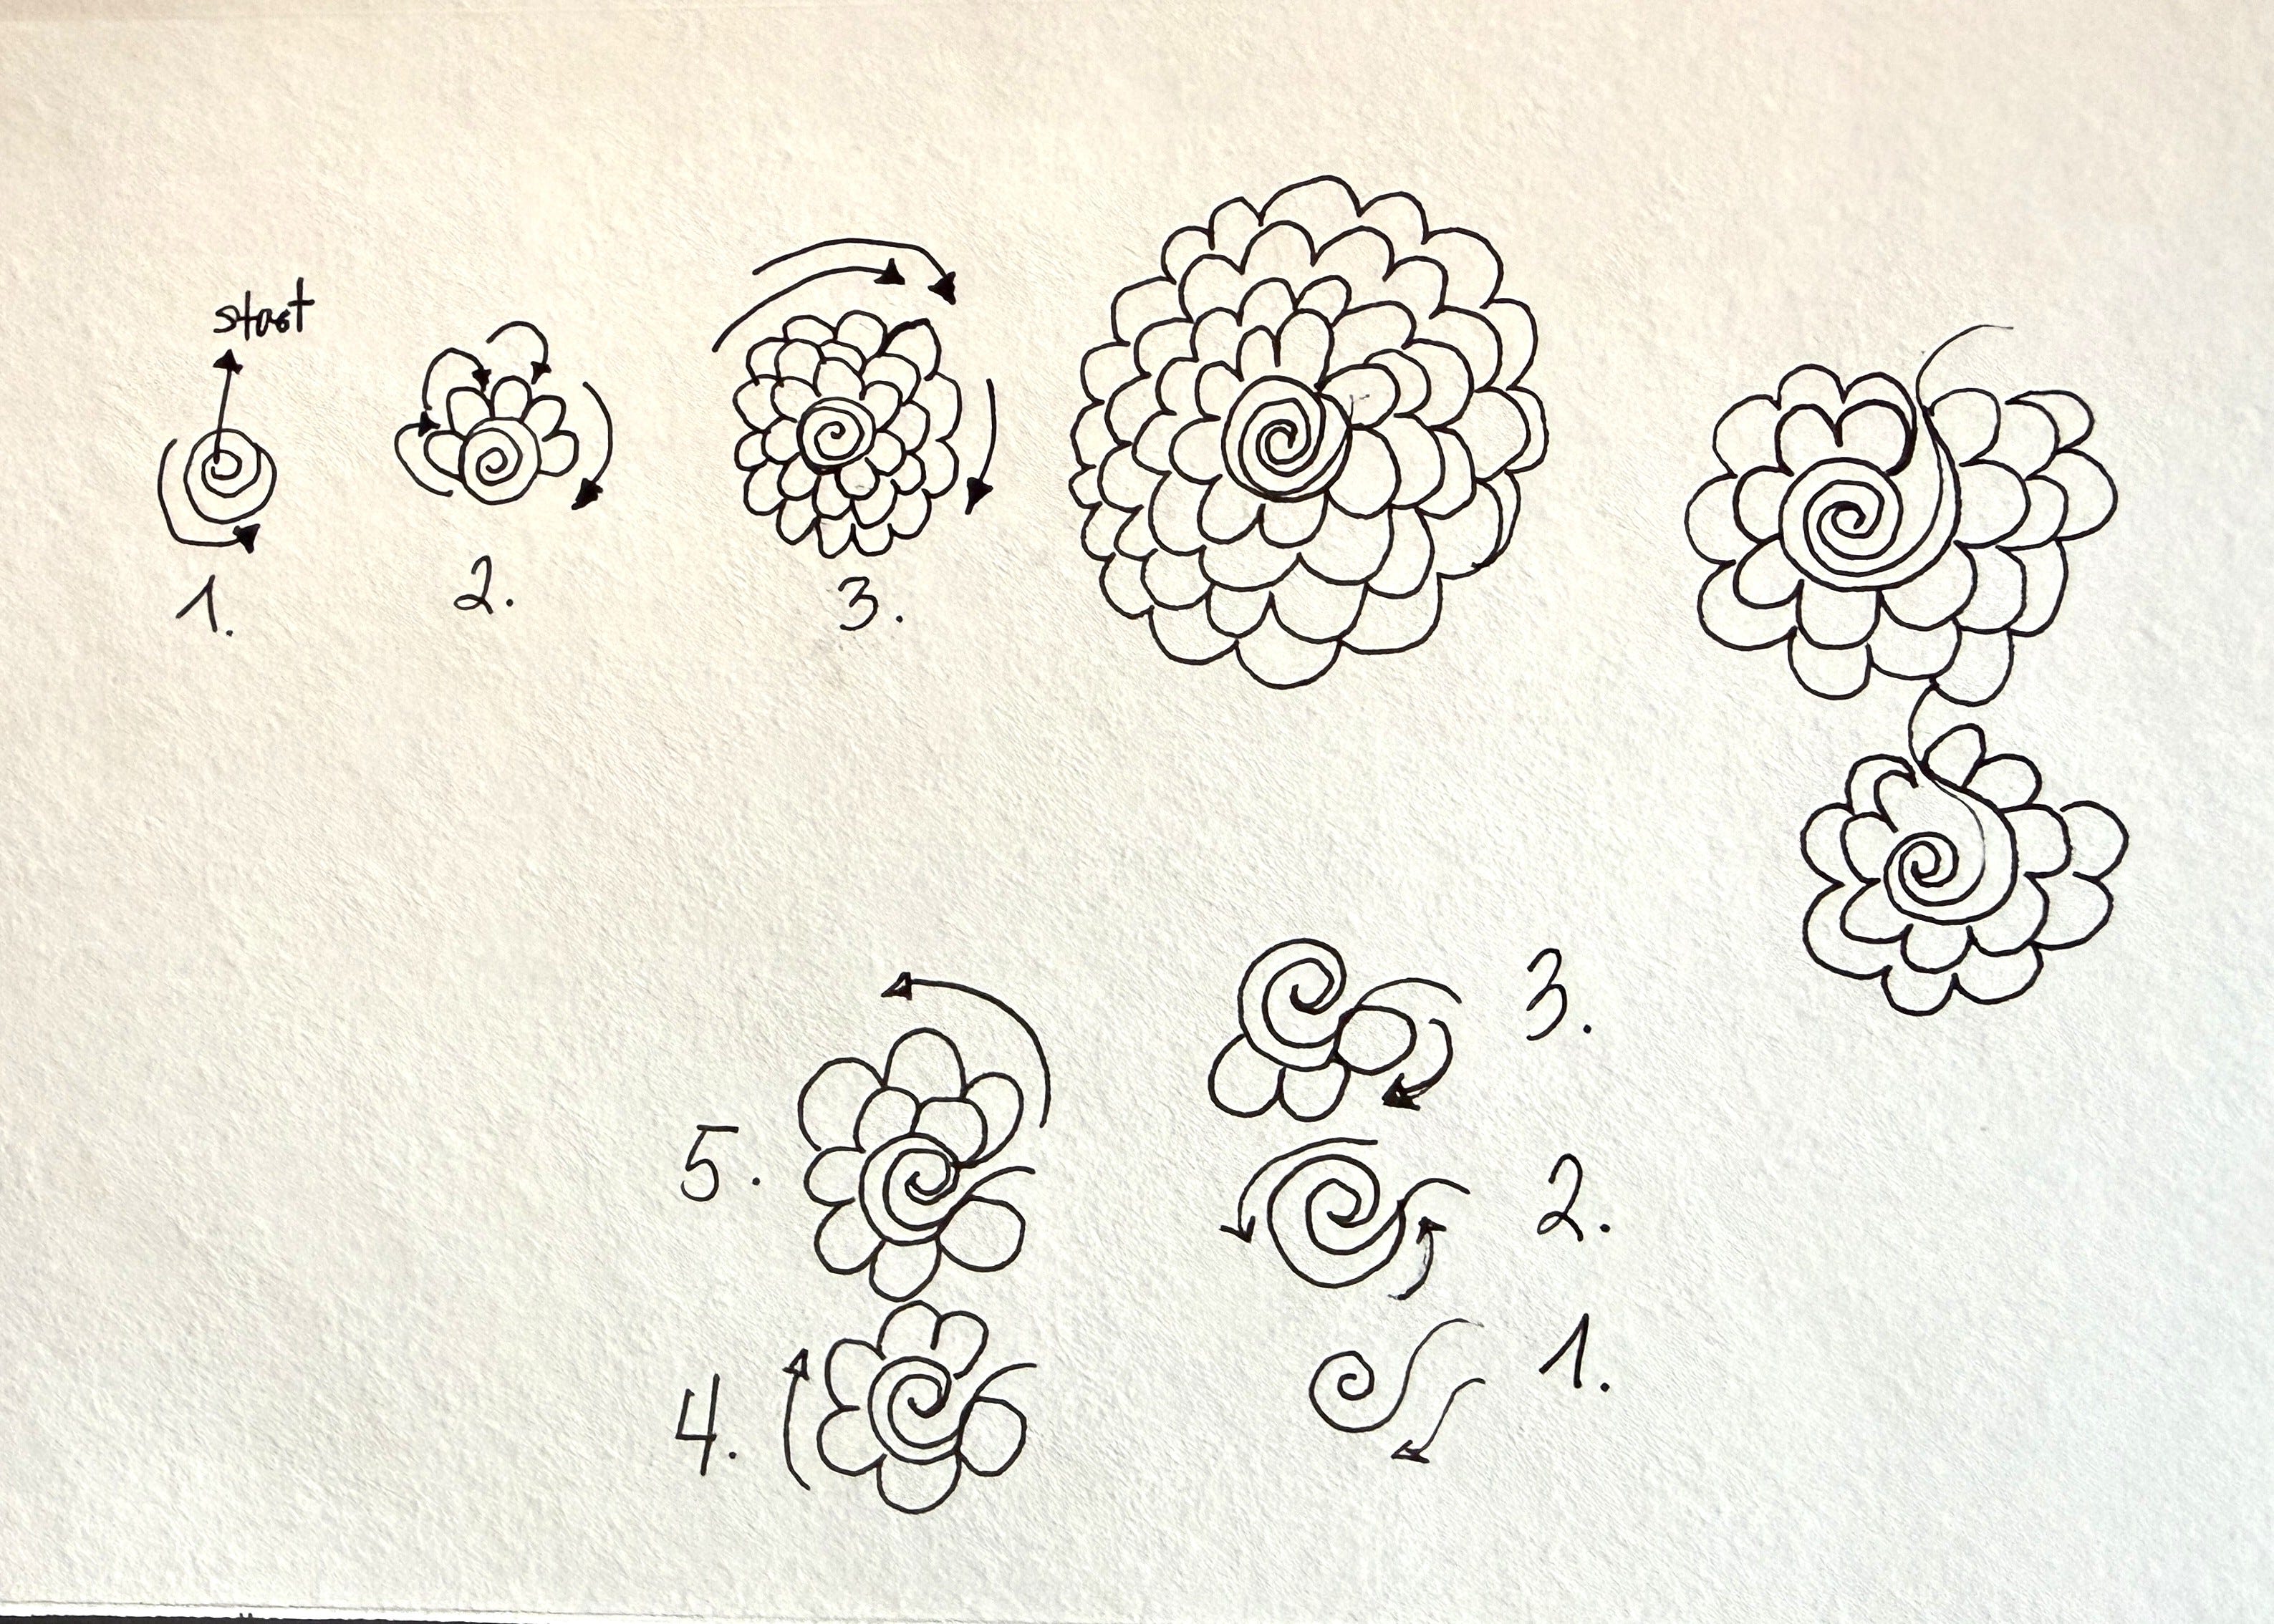
Flower
This looks like a zinnia or marigold.
Make a swirl.
Then follow that swirl back out to where you started.
Now add little arcs along that swirl line.
Continue until you reach where you started your swirl.
Head back the other way making your small arcs. You can make as many rows of small arcs as you want.
For a single flower, start in the center and swirl outward creating a circle. Then make your rows of little arcs.
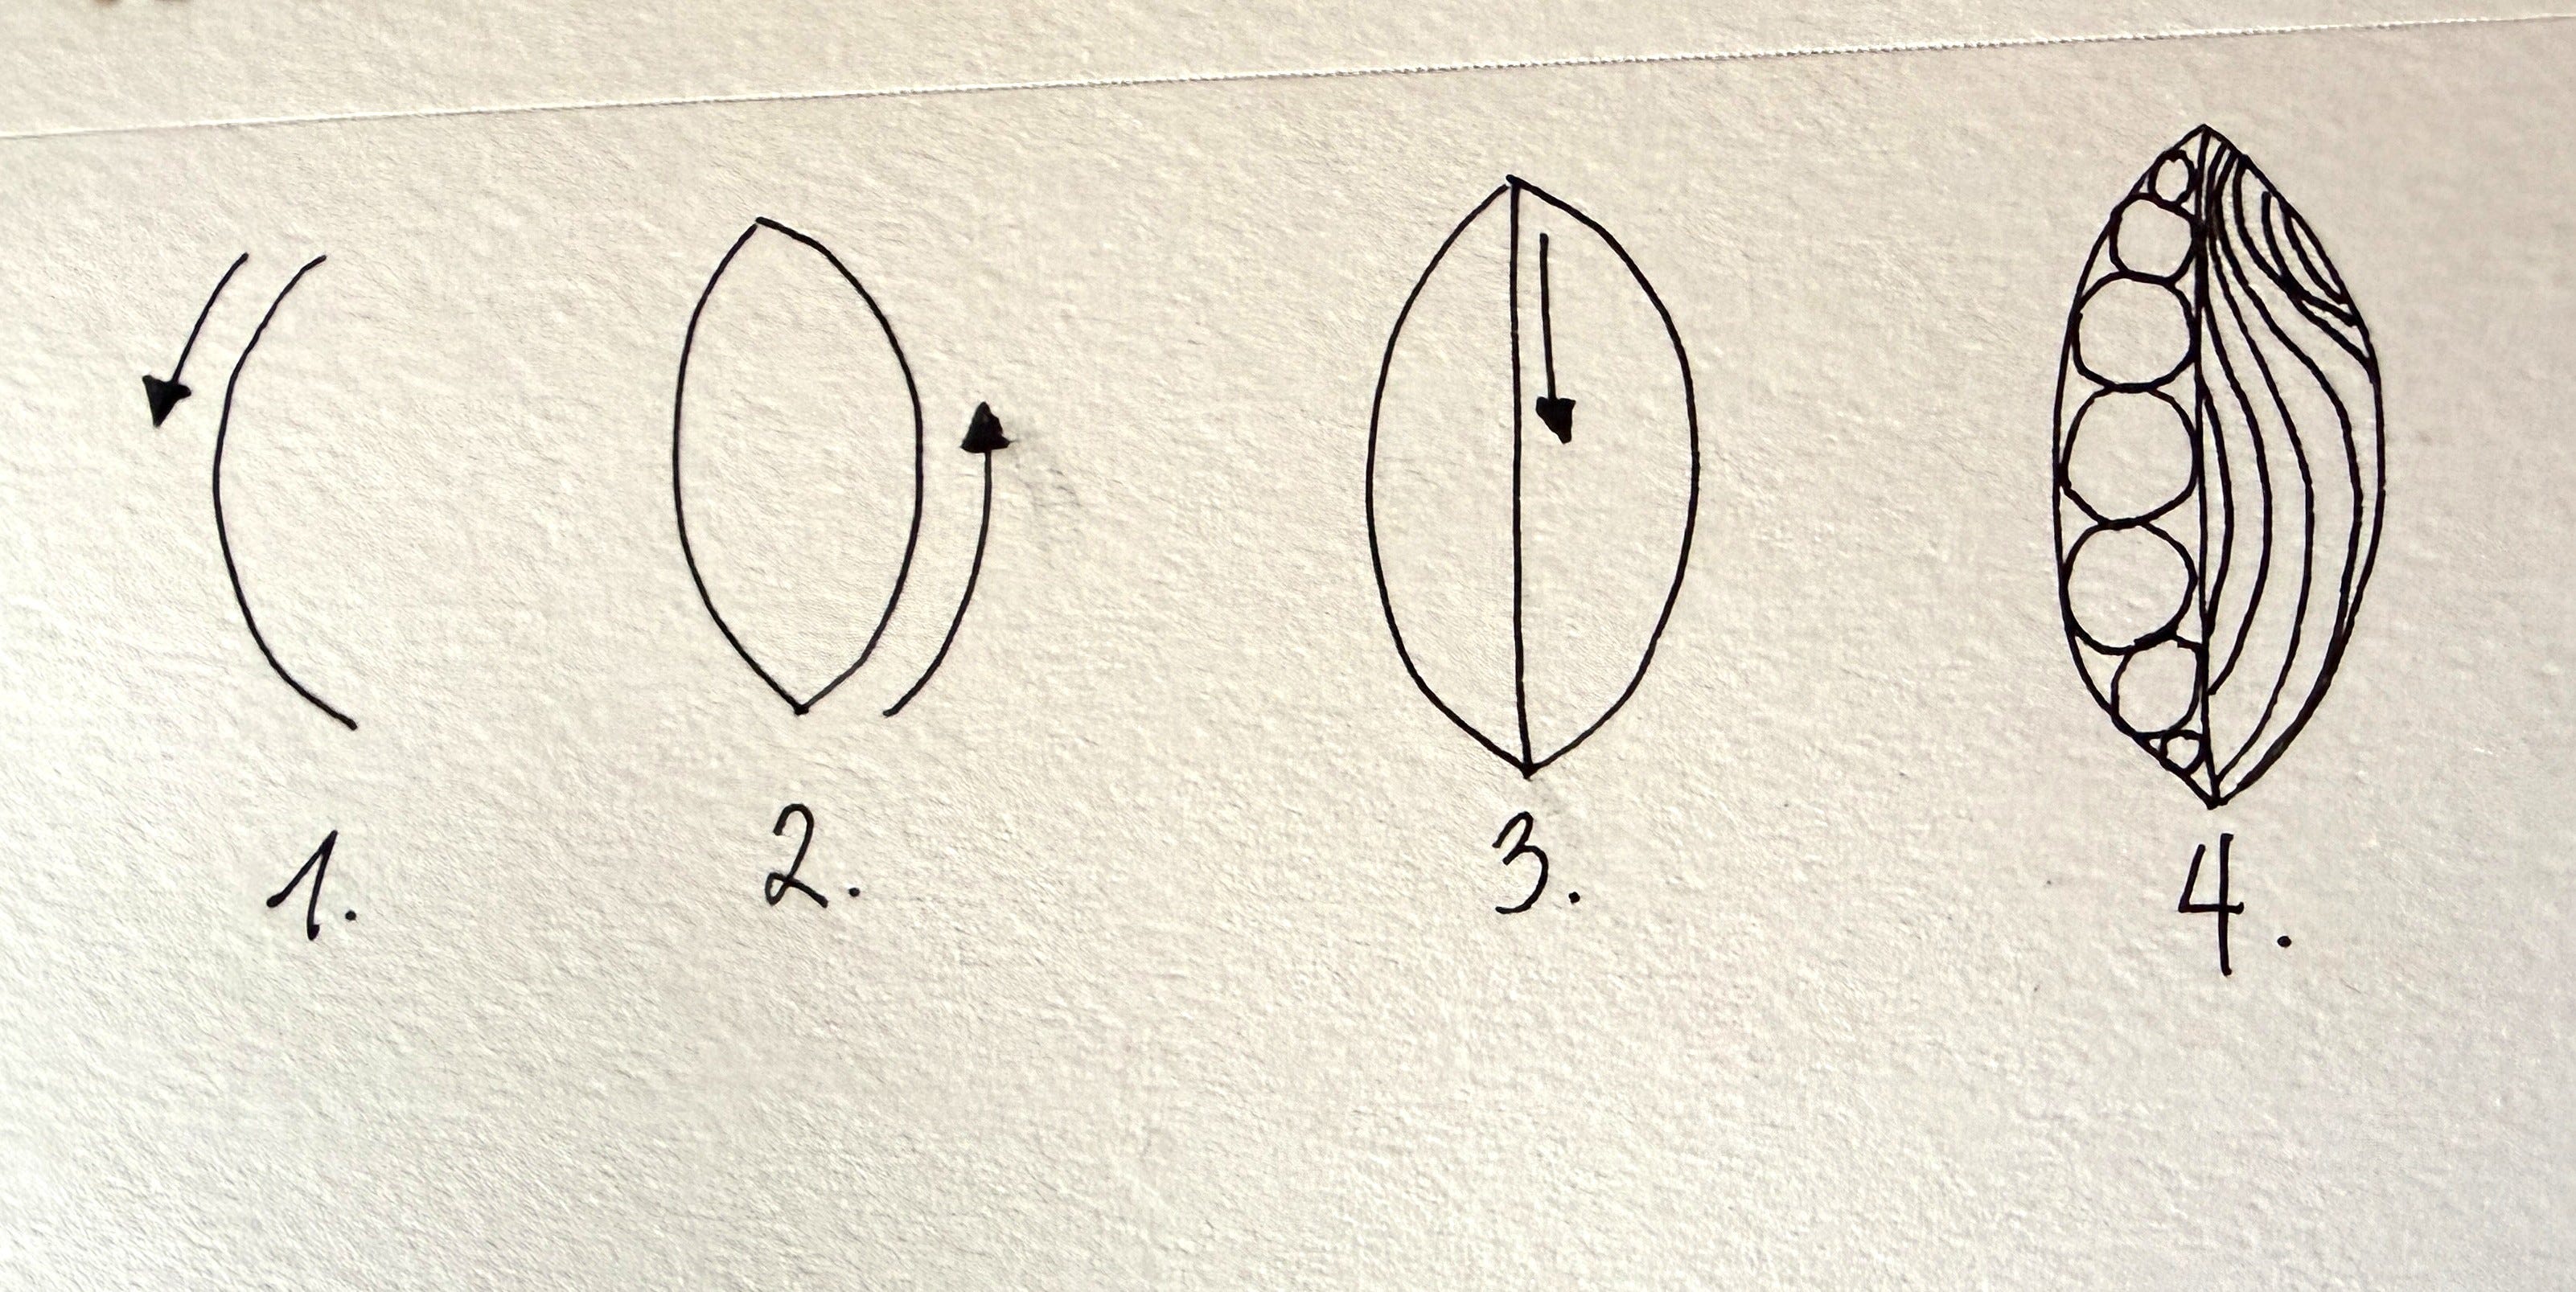
Leaves
This looks like a basic leaf and you can fill it with other patterns.
Make half an arc.
Then make the other half and close it at the top. You should have a squished circle that looks like a leaf.
Draw a line down the middle of your leaf.
Fill your leaf with other patterns.
As you do these free motion drawings, see what happens when the movement leads and the pencil follows. Notice when you find a rhythm with one of them. Sometimes the practice is just staying with something a little longer than usual to build that body memory.
Technical Note
We started with line, but we didn’t stop there. As lines accumulate, they begin to converge, cross, echo, soften, repeat—and suddenly we’re no longer just drawing lines. We’re working with texture, pattern, repetition, and rhythm.
These aren’t just formal design concepts. They are also somatic cues for the nervous system to recognize safety, stimulation, predictability, novelty, and flow.
Texture: refers to the surface quality of the mark, paint, or other media, such as density, layered, soft, gritty. But texture is also how these marks feel in the body while making them and when looking at them. Our brains map visual texture onto tactile memory.
Pattern: Pattern is an organized repetition of visual elements—lines, shapes, marks, or textures—that creates structure and continuity. Patterns can be regular and predictable or irregular and evolving. Pattern helps us orient through predictability or notice when that predictability changes to uncertainty.
Repetition: when an element—line, shape, gesture, or mark—is used again and again. It’s one of the primary ways an image builds coherence and emphasis. But it is also a way to soothe and regulate and allow sensations and meaning to unfold over time.
Rhythm: Rhythm is the sense of movement created by repeated elements with variation—changes in spacing, direction, pressure, or intensity. Rhythm guides the eye the way a beat guides music. Visually, it guides the eye. Somatically, it reflects pace, breath, and the body’s sense of flow or strain.
A visual language is, at its core, a conversation between your hand, your eye, and your body.
Reflection
Which of these patterns held your attention when you drew it? The one where you lost track of time while you were doing it.
Losing track of time means you are in flow, and that’s where the processing happens—memories, experiences, and identity.
Conversation
Before I got sick, I sketched these patterns over and over, filling up sketchbooks. That practice built my body memory for them. I could “automatically” draw them on my quilting machine.
After I got sick, this body memory was one of the few things that survived because my hand did all the thinking. The repetition gave me space to reflect, to process emotions and self-regulate. It took a long time before I had the coordination to free motion quilt again. The drawing came first. And the body memory of drawing these connected me to my old self but also let me create a new self.
Since getting sick I have gravitated more toward improv quilting—a form of modern quilting that doesn’t use patterns, rulers, or traditional blocks. But I continue to use these free motion quilting patterns and it’s like one continuous thread from pre illness story to now.
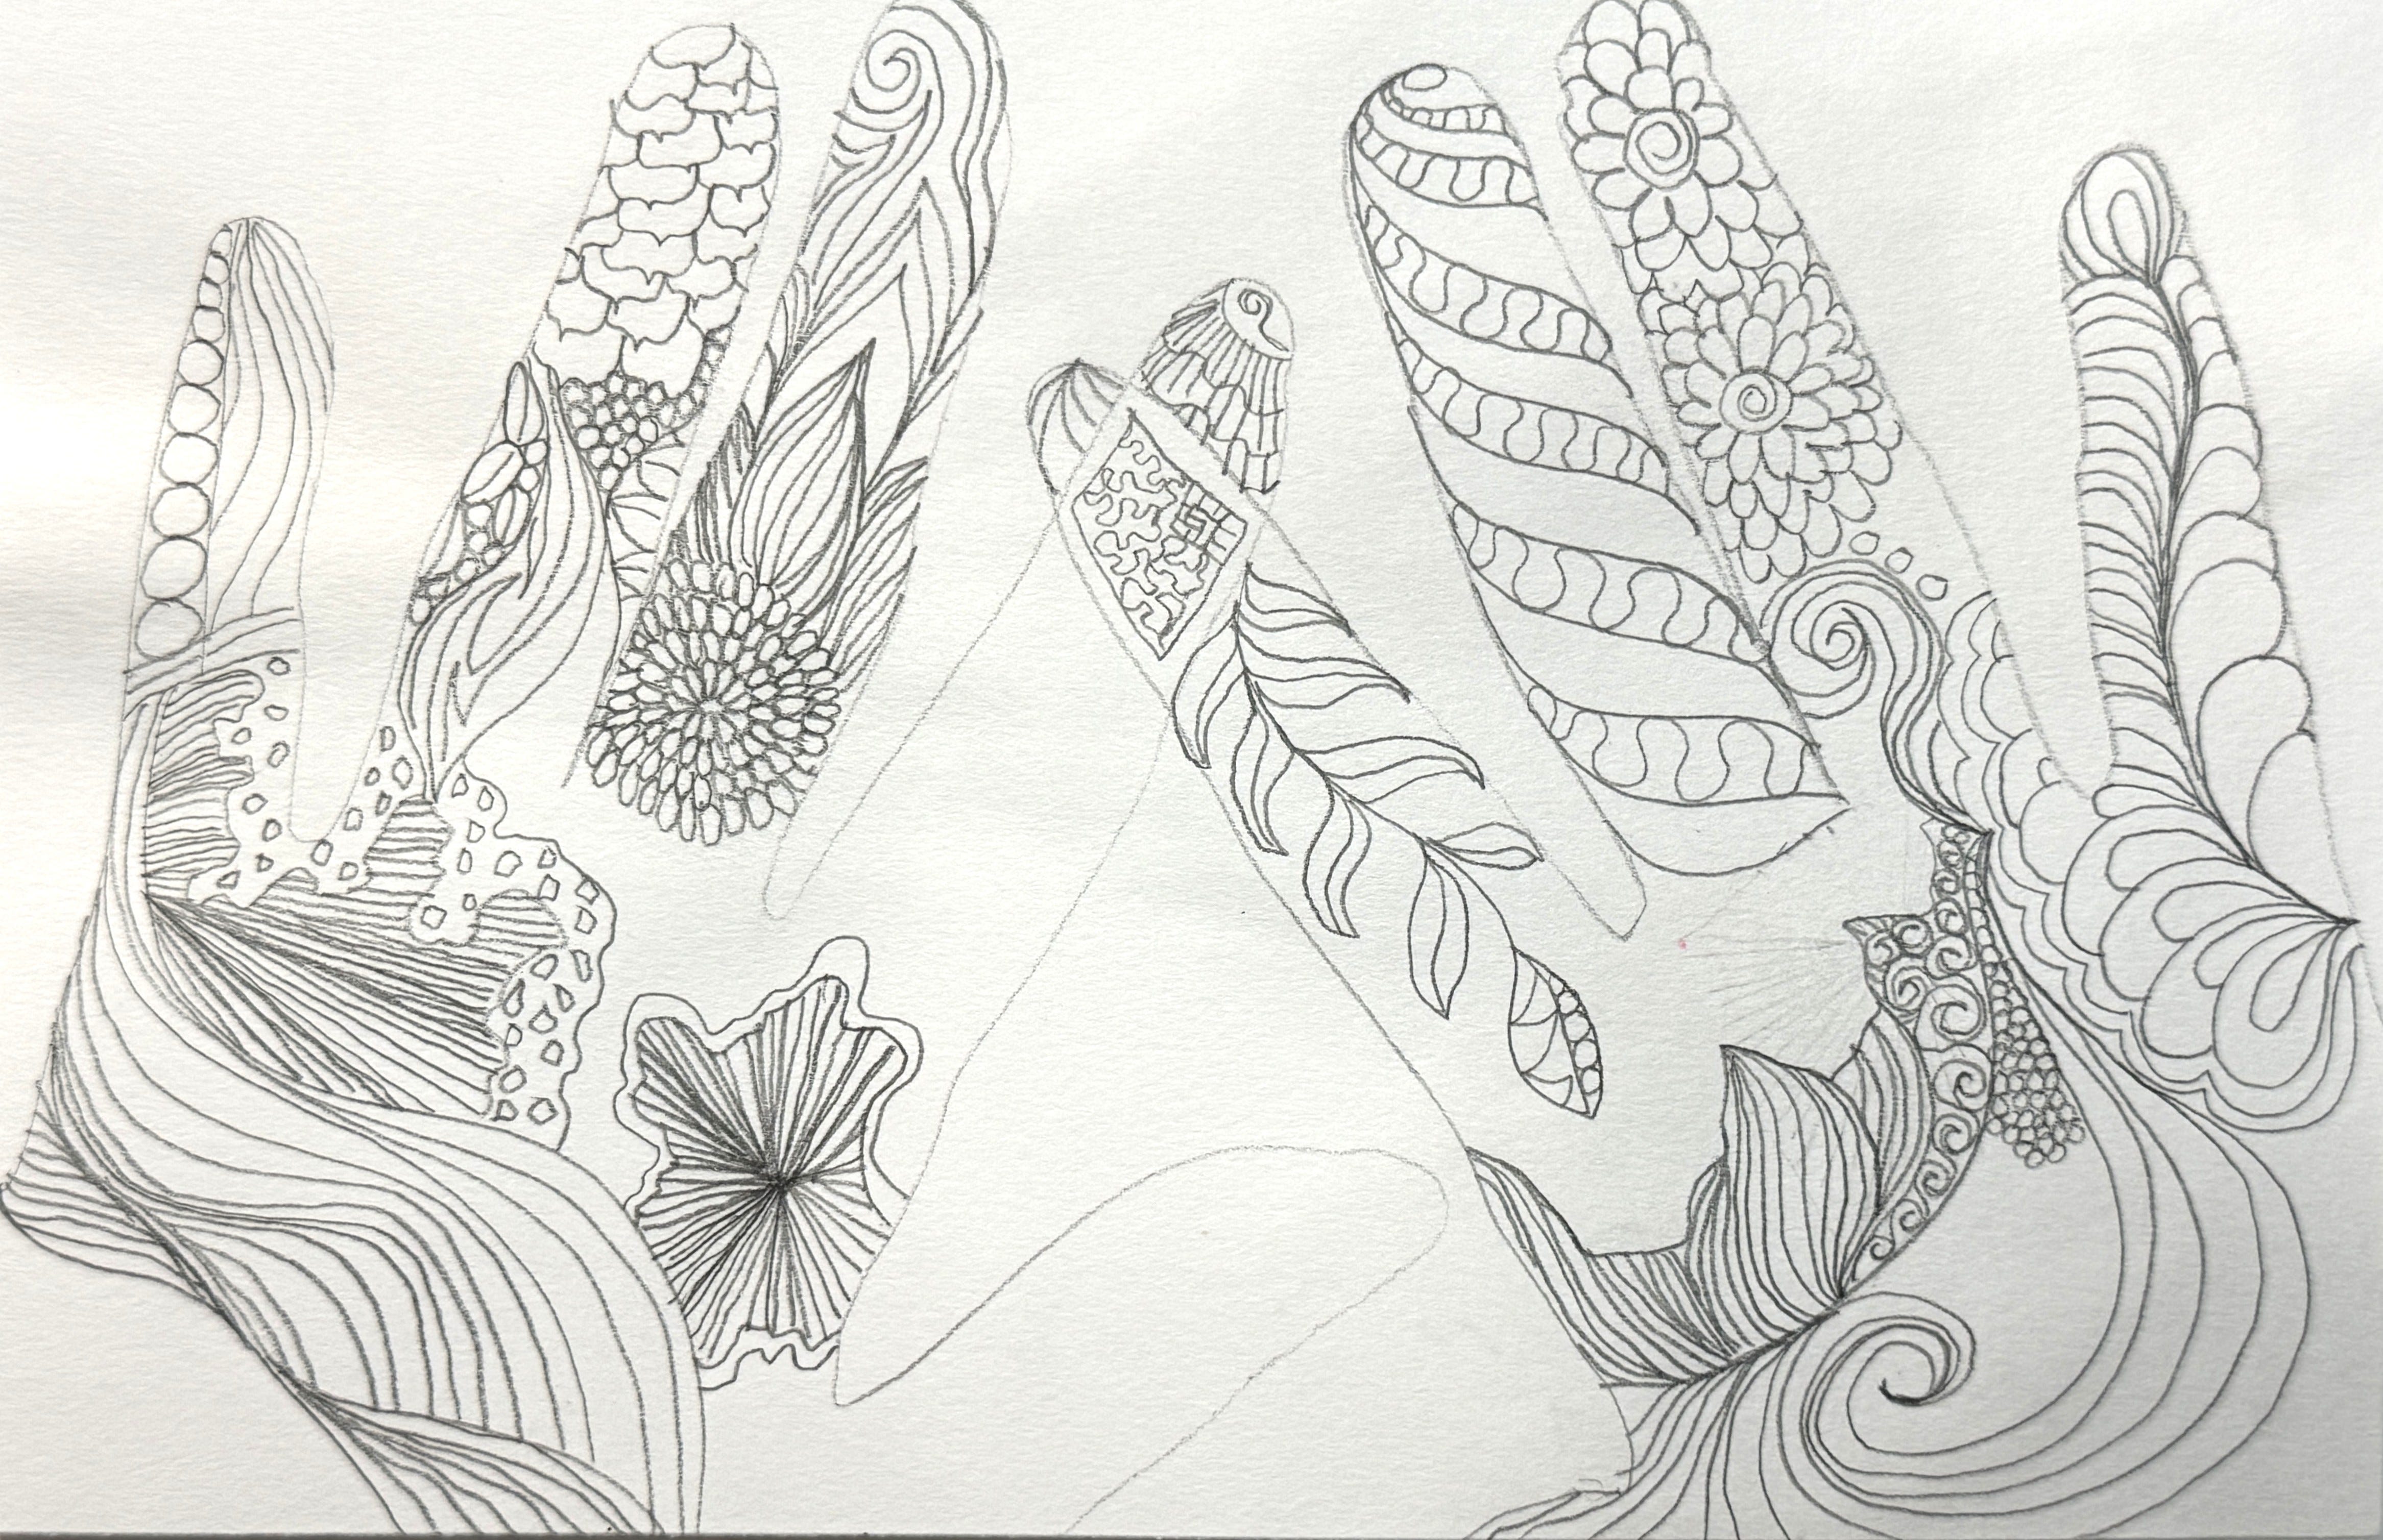
Check out
I invite you to trace your hand on a page in your sketchbook or copy paper. Then use these Free Motion Drawings and any other doodles or Zentangle-like motifs to fill in your hand.
You can return to this hand drawing whenever you want. This drawing is also portable. A sketchbook and pen fit in most bags.
Until Next Time
Free Motion drawing is one way to build your visual language — through repetition, body memory, and letting the hand lead.
In the next practice, we’re going to slow that down even further. Same principle, different pace.
This work is sustained by the generosity of this community. If this work resonates, here are ways to continue:
Go Deeper
Register for a workshop or book a 1:1 creative practice series for more contained support.
Join Wayfinding
Become part of the ongoing creative practice circle with access to live art lounges, workshops and workshop recordings, and community gatherings.
There will always be a free Unfolding Path tier with short therapeutic practices, studio reflections, and arts & health insights for women navigating chronic illness.
Because healing isn’t linear — and neither is art.
